Virtual Audition Tips for a Professional Home Setup That Impresses
A great audition can get lost in bad sound, harsh lighting, or a background that pulls focus. That sounds unfair, but it’s also fixable. You don’t need a studio, expensive gear, or a huge spare room. You need a small, reliable setup that lets casting teams see your face, hear your choices, and stay with the performance.
Virtual castings and e-auditions have made it easier to audition from anywhere, including a bedroom corner, a quiet hallway, or a clean patch of wall in your home. The challenge is making that space look intentional rather than improvised.
Here’s how to build a simple home audition setup that feels polished, calm, and easy to repeat.
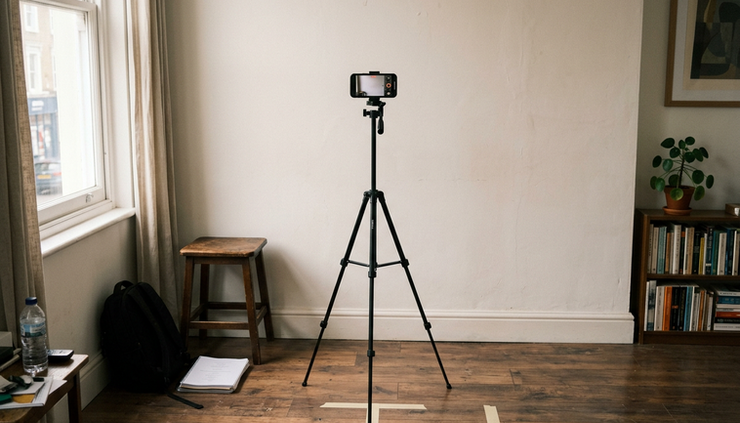
Choose a location that keeps the focus on you
The best audition spot in your home is usually the quietest, plainest, most controllable one. It doesn’t have to be the prettiest room. In fact, a beautiful room can sometimes be distracting if it has busy shelves, mirrors, bright artwork, or people moving in the background.
Look for a spot with these three things:
A simple background
A blank wall, curtain, or neatly arranged corner works well. Soft neutral colours are safest because they don’t fight with your face or costume.
Enough distance from the wall
Try to stand at least 60 cm to 1 metre away from the background. This helps avoid harsh shadows and gives the frame a little depth.
Control over noise and movement
Choose a room where you can close the door, pause fans if they’re noisy, and reduce interruptions from family, pets, traffic, or kitchen sounds.
A bedroom often works better than a living room because you can control it. A passageway can also work if it has clean light and low echo. If you’re in a shared home, tell people your audition time and put a note outside the door. It might feel awkward the first time, but it’s much better than stopping mid-scene because someone walks in looking for a charger.
Keep the background honest and low-key
Your background should support the audition, not announce itself. Casting teams are not judging your interior design. They’re watching your expression, listening to your voice, and checking whether you fit the role.
Avoid:
Open wardrobes
Reflective glass or mirrors
Bright patterned bedsheets
Religious or political posters
Family photos in clear view
Clutter on shelves
Moving ceiling fans in frame
If all you have is a busy wall, hang a plain bedsheet or curtain. Iron it if possible, or pull it tight so it doesn’t look messy. A few creases won’t ruin anything, but a wrinkled sheet directly behind your head can pull attention.
Mark your spot
Once you find a good frame, use small tape marks on the floor. Mark where your feet go and where the camera or tripod stands. This saves time before every audition and helps you keep continuity if you need to do multiple takes.
For self-tapes, consistency matters. If you record take one in good light and take two closer to the wall with a different angle, the editing feels uneven. A simple floor mark fixes that.
Light your face so your performance reads clearly
Good lighting doesn’t mean bright lighting. It means clear, even light that shows your eyes. The eyes carry a lot of the performance, especially in close-ups. If your eyes are shadowed, the scene can feel flat even if the acting is strong.
The easiest setup is natural window light. Stand facing the window, with the camera between you and the window if possible. Avoid standing with the window behind you, because the camera will expose for the bright background and your face may turn dark.
If you’re recording during the day, try this:
Face a window with soft daylight.
Keep the camera at eye level.
Turn off harsh overhead lights if they create shadows under your eyes.
Use a white wall, bedsheet, or chart paper nearby to bounce light back onto the darker side of your face.
If the sunlight is too strong, use a thin curtain to soften it. Direct sun can create sharp shadows and make you squint. Soft light is kinder and more consistent.
A useful rule: if you can clearly see both eyes in the recording without squinting or heavy shadows, your lighting is probably working.
Use artificial light when daylight isn’t reliable
For evening auditions or cloudy days, use a lamp placed slightly in front of you and to one side. If the light looks harsh, soften it by bouncing it off a wall or placing it farther away. Don’t cover hot lamps with cloth or paper. That can be unsafe.
If you use a small video light, keep it near eye level rather than above your head. A light placed too high creates deep shadows under the eyebrows, nose, and chin. A light placed too low can look unnatural, like torchlight in a ghost story.
Try this simple home layout:
Setup element | Best placement | Why it helps |
Camera or mobile | At eye level, stable and straight | Keeps your face natural and avoids awkward angles |
Main light | In front of you, slightly to one side | Shapes the face without hiding the eyes |
Background | At least 60 cm behind you | Reduces shadows and adds depth |
Reader | Beside the camera, not far away | Keeps your eyeline close to the lens |
Match the mood without overdoing it
Some scenes are dramatic, some are comic, some are intimate. That doesn’t mean you need theatrical lighting. Casting professionals generally need a clean view of your face first. Let the performance create the mood.
If a scene is serious, don’t make the frame dark just to look intense. If it’s light comedy, don’t flood the room until your face is flat and washed out. Aim for natural, readable, and steady.
Get clean audio before you worry about fancy video
People will forgive slightly imperfect video more easily than muffled or noisy sound. If the dialogue is hard to hear, the scene becomes hard to judge.
Start by listening to your room. Clap once and hear what happens. If the sound bounces sharply, the room is echoey. Bare walls, tiled floors, and empty rooms reflect sound. Soft things absorb it.
To improve sound without buying much:
Record near curtains, cushions, bedding, or a fabric-covered surface.
Put a rug or thick mat on the floor if the room has tiles.
Turn off noisy fans, coolers, washing machines, and kitchen appliances.
Close windows during takes if traffic, construction, or street vendors are loud.
Keep the microphone close enough to your voice.
Most phones can capture decent sound in a quiet room if they’re not too far away. For a self-tape, place the phone close enough for a mid-shot or medium close-up, not across the room. If the camera is too far, your voice will sound thin and distant.

Test your sound with headphones
Before submitting a tape, listen back with headphones. Phone speakers can hide problems. Headphones reveal mouth noise, background hum, echo, low volume, and sudden peaks.
Check for:
Dialogue that feels too soft
Words getting swallowed at the end of sentences
Noise from jewellery, clothing, or paper
Volume changes when you turn your head
A reader who is louder than you
Your reader should be audible but not overpowering. They’re there to support the scene, not perform over it. Ask them to stand near the camera so your eyeline stays natural, and ask them to read slightly softer than you.
Watch out for sync issues
If you use a separate microphone, record a short test before doing the full scene. Make sure the sound matches your mouth movement. Separate audio can be helpful, but it adds one more thing that can go wrong. For many early auditions, a quiet room and a close phone are enough.
Present yourself on camera with calm confidence
The camera changes performance. Small choices read bigger. A tiny eye movement can matter. A forced gesture can feel too large. For self-tapes and video calls, your job is to let the camera come close without shrinking your energy.
Start with framing. Most audition tapes work best in a medium close-up, from around the chest or shoulders to just above the head. Some full-body slates or movement shots may be requested, but the main scene usually needs the face clearly visible.
Keep the camera at eye level. Looking down into a low camera can distort the face and weaken presence. Looking up at a high camera can make the performance feel distant. Eye level feels direct and human.
Know where to look
For self-tapes, don’t stare straight into the lens unless the instructions ask for it or the scene calls for direct address. Place your reader just beside the camera. This gives a natural eyeline while still keeping your face open.
For live e-auditions, look at the screen when listening and near the camera when speaking if it feels natural. You don’t need to lock your eyes onto the lens the whole time. That can look stiff. The goal is connection, not a staring contest.
Dress with the role in mind
Wear something clean, simple, and close to the tone of the character. You don’t need a full costume unless asked. If the role is a doctor, a plain shirt can suggest neatness without turning the tape into a costume parade. If the role is a college student, simple casual clothing may work better.
Avoid clothes that create technical problems:
Tiny stripes or busy patterns
Loud jewellery
Shiny fabrics that reflect light
Colours too close to your background
Logos or large text
Also check your hair before recording. Hair falling into the eyes can block expression, especially in close-up.
Slate clearly if requested
A slate is usually a short introduction with your name and other requested details. Follow the exact instructions from the casting notice. If they ask for height, location, language skills, or profiles, include only what they ask for.
Keep it warm and simple. Don’t perform the slate like a commercial. A relaxed smile, clear voice, and steady frame are enough.
Avoid the small mistakes that make auditions feel rushed
Most home audition problems happen before the acting starts. A low battery, messy background, odd framing, or late upload can create stress you don’t need.
Here are common pitfalls and how to avoid them.
Recording without checking the brief
Read the audition instructions twice. Casting teams may request a specific frame, file format, naming style, deadline, slate, or number of takes. If you ignore those details, the tape can feel careless even when the performance is good.
Make a quick checklist:
Scene or sides downloaded
Deadline confirmed
Slate instructions checked
Frame size checked
File name checked
Contact details removed from the visible frame unless requested
Submission link or upload method ready
Sending too many takes
More takes don’t always help. If the brief asks for one take, send one. If it allows options, two contrasting takes are usually more useful than five similar ones.
Pick the take where the story is clearest, not just the one where every word is perfect. A tiny line stumble may matter less than a truthful moment.
Over-editing the tape
Keep edits simple. Trim the start and end. Combine slate and scene only if requested. Don’t add music, filters, heavy colour effects, or dramatic transitions. Casting teams want to see the performance as clearly as possible.
Forgetting the live audition basics
For video calls, log in early. Test the camera, sound, and internet connection. Keep the script nearby but not blocking your face. If there’s a tech issue, stay calm and communicate clearly.
A good phrase to have ready is, “I’m sorry, the audio dropped for a moment. Could you please repeat that?” That’s better than pretending you heard the direction and guessing.
Waiting until the deadline to upload
Large video files can take time, especially on slower connections. Upload early when you can. If your internet is unstable, compress the file carefully while keeping your face and sound clear. Watch the final uploaded version if the platform allows it.
If you’re submitting through a casting platform such as glameteria, name and upload the file exactly as requested. Clean admin helps your tape land smoothly.
Build a simple pre-audition routine
A routine helps you stop fussing with the setup and start acting. It also makes your space feel familiar, which is useful when nerves show up.
Try this 15-minute routine before recording:
Set the room.
Close the door, silence notifications, reduce background noise, and clear the frame.
Check the frame.
Stand on your tape mark and record five seconds. Look for headroom, shadows, background clutter, and camera height.
Check the sound.
Record one line at performance volume. Listen with headphones.
Warm up gently.
Move your jaw, loosen your shoulders, breathe low, and say a few lines out loud.
Do one rehearsal take.
Don’t judge it too much. Use it to settle your eyeline and pace.
Record your real takes.
Give each take a clear intention. If you repeat the same choice every time, you’re just collecting duplicates.
Review like a casting viewer.
Ask, “Can I see the eyes, hear the words, and follow the story?” If yes, you’re close.
The point isn’t perfection. It’s readiness. When the basics are handled, you can focus on the scene instead of the socket, the curtain, or the neighbour’s pressure cooker.
A professional setup is really a considerate setup
A strong home audition setup tells casting teams, “I’ve made it easy for you to watch my work.” That’s the whole idea. Clean background, steady framing, soft light, and clear sound are acts of consideration. They help the viewer stay with your choices.
Start with what you already have. A quiet corner, a mobile phone, daylight, a chair or tripod, and a few minutes of testing can take you far. Improve one thing at a time. Fix the echo this week. Mark your frame next time. Learn your best light at different times of day.
Virtual auditions can feel strange at first, but they also give you control. You can prepare the room, test the take, breathe, and try again. Build a setup you trust, then let it disappear behind the performance. That’s when the audition starts to feel like yours.


Comments